A tattoo sleeve is a serious commitment—financially, physically, and artistically. Unlike a small piece you can hide or laser later, a sleeve becomes part of your identity. And yet most people approach sleeve planning with less preparation than they'd put into buying a car.
I've spent years in the tattoo industry, watching people rush into sleeve projects only to hit roadblocks: the design doesn't flow, the artist wasn't right for the style, they ran out of budget halfway through, or they simply didn't think through what living with a sleeve actually means.
This guide is the resource I wish existed when I started. Whether you're considering your first sleeve or adding to existing work, here's everything you need to know to plan a sleeve you'll love for decades.
What Is a Tattoo Sleeve?
Before diving into planning, let's clarify what we're talking about. A "sleeve" refers to a large tattoo (or collection of tattoos) that covers most or all of the arm, creating a cohesive look similar to a shirt sleeve.
Types of Sleeves
Full Sleeve
- Coverage: Wrist to shoulder
- Typical cost: $2,000–$6,000+
- Sessions: 6–15 sessions (depending on complexity)
- Time to complete: 6 months to 2 years
Half Sleeve
- Coverage: Either shoulder to elbow OR elbow to wrist
- Typical cost: $800–$3,000
- Sessions: 3–8 sessions
- Time to complete: 3–12 months
Three-Quarter Sleeve
- Coverage: Wrist to above elbow (or elbow to shoulder)
- Typical cost: $1,500–$4,500
- Sessions: 4–12 sessions
Leg Sleeve
- Same concepts apply to full leg coverage (ankle to hip)
- Generally more painful due to bone proximity
- Often higher cost due to larger surface area
 Different types of tattoo sleeves showing full half and three-quarter coverage
Sleeve vs. Collection of Tattoos
Here's an important distinction: a sleeve is designed as a unified piece. It's not just a bunch of tattoos that happen to be on your arm. The difference:
A sleeve features:
- Unified background elements (fog, waves, smoke, mandalas, etc.)
- Cohesive color palette or consistent black and grey
- Flow that follows the body's natural lines
- Negative space used intentionally
- Transitions between subjects that feel natural
A collection features:
- Individual pieces with separate backgrounds
- Different styles mixed together
- Gaps of untattooed skin between pieces
- No unifying elements
Both approaches are valid—but if you want a sleeve, you need to plan for a sleeve from the start. Converting a collection into a sleeve requires cover-ups, laser fading, or creative gap-filling that adds cost and complexity.
Step 1: Define Your Vision (Before You Talk to Any Artist)
The biggest mistake people make is walking into a shop saying "I want a sleeve" without any clear direction. That's like walking into an architect's office and saying "I want a house."
Before booking consultations, you need clarity on several key decisions:
Choose Your Style
Your sleeve's style determines everything: which artists to consider, how long it takes, what it costs, and how it ages. Common sleeve styles include:
Japanese (Irezumi)
- Features: Koi, dragons, tigers, waves, wind bars, peonies
- Characteristics: Flowing composition, bold outlines, extensive background work
- Time: Longer sessions due to detail
- Cost: Premium due to skill required
- Best for: People who want a traditional, timeless look
American Traditional
- Features: Eagles, ships, roses, pin-ups, daggers
- Characteristics: Bold black outlines, limited color palette, 2D appearance
- Time: Faster than Japanese due to bold lines
- Cost: Moderate
- Best for: Those wanting classic, bold artwork
Black and Grey Realism
- Features: Portraits, nature scenes, religious imagery
- Characteristics: Photorealistic detail, smooth shading, no outlines
- Time: Very long sessions
- Cost: Premium
- Best for: Detail-oriented people wanting lifelike imagery
Geometric/Mandala
- Features: Patterns, sacred geometry, dotwork
- Characteristics: Symmetrical, precise linework, often wraps around arm
- Time: Moderate to long
- Cost: Moderate to premium
- Best for: People drawn to pattern and symmetry
Neo-Traditional
- Features: Bold subjects with more color and detail than traditional
- Characteristics: Rich colors, ornamental elements, illustrative quality
- Time: Moderate
- Cost: Moderate to premium
- Best for: Those wanting traditional roots with more artistic freedom
Trash Polka
- Features: Realistic and abstract elements combined
- Characteristics: Black and red only, collage aesthetic, chaotic composition
- Time: Moderate
- Cost: Moderate to premium
- Best for: People wanting something edgy and unconventional
Not sure which style fits you? Browse our complete guide to tattoo styles for AI generation to see visual examples and learn the characteristics of each.
Define Your Subject Matter
Beyond style, what do you actually want depicted? Consider:
Personal meaning: Memorial pieces, cultural heritage, life milestones Aesthetic preference: You love how Japanese dragons look, even without deep personal connection Narrative: A story told across the arm (birth to present, struggle to triumph) Pure decoration: You want beautiful art that doesn't need deep symbolism
All approaches are valid, but being honest with yourself helps communicate your vision to artists.
Decide on Color vs. Black and Grey
This decision affects:
- Which artists to consider (some specialize)
- Long-term maintenance (color fades differently)
- Cost (color often takes longer)
- How the tattoo ages
Black and Grey:
- Ages more gracefully
- Works on all skin tones
- Generally less expensive
- Timeless aesthetic
Color:
- More visually striking initially
- May require touch-ups over time
- Best on lighter skin tones
- Higher cost due to time involved
Step 2: Budget Realistically
A sleeve is a significant financial investment. Under-budgeting leads to half-finished work, compromises on artist quality, or financial stress that ruins the experience.
Understanding Sleeve Costs
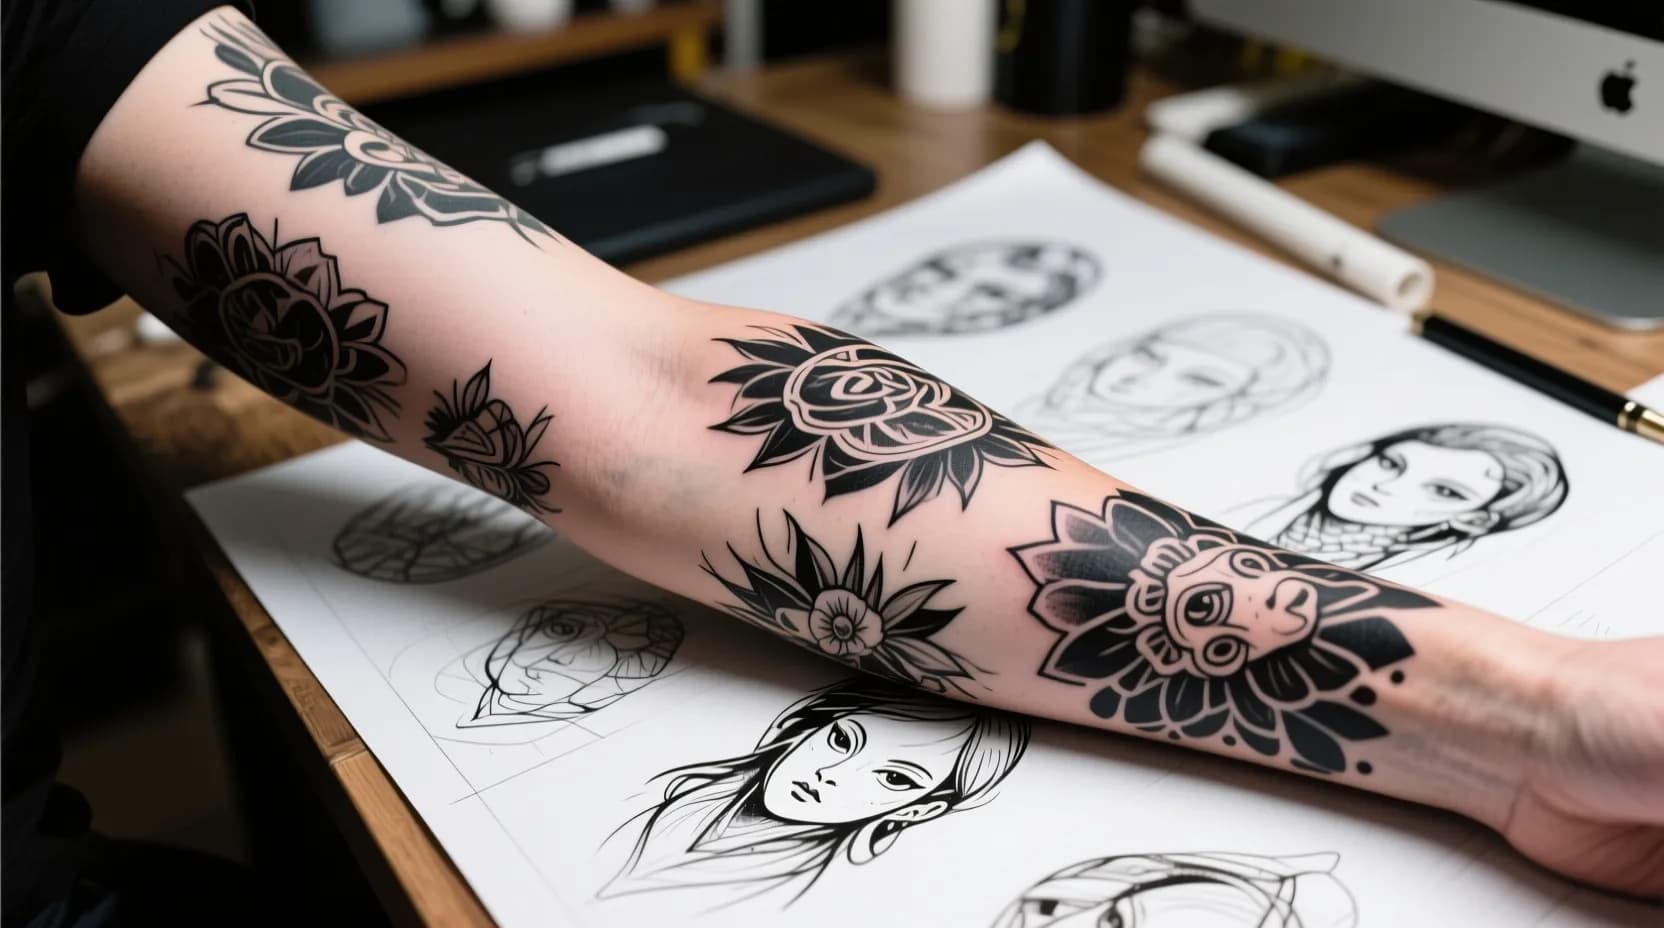
 Tattoo artist working on detailed sleeve design
Base Costs:
| Sleeve Type | Budget Range | Mid-Range | Premium |
|---|---|---|---|
| Half Sleeve | $800–$1,500 | $1,500–$2,500 | $2,500–$4,000+ |
| Full Sleeve | $2,000–$3,500 | $3,500–$5,000 | $5,000–$10,000+ |
| Leg Sleeve | $2,500–$4,000 | $4,000–$6,500 | $6,500–$12,000+ |
What drives cost:
- Artist's hourly rate ($100–$400+/hour)
- Complexity and detail level
- Color vs. black and grey
- Your pain tolerance (shorter sessions = more total cost due to setup time)
- Geographic location
- Artist's demand and reputation
Hidden Costs to Budget For
Beyond the tattoo itself, plan for:
Deposit: Typically $100–$500 to book (applied to final cost)
Tipping: 15–25% per session (not optional in tattoo culture)
- For a $3,000 sleeve: $450–$750 in tips
- See our complete guide on how much to tip your tattoo artist
Aftercare Products: $50–$150 total
- Quality fragrance-free soap
- Recommended aftercare ointment/lotion
- Saniderm or similar protective covering (if not provided)
Travel Costs: If your ideal artist isn't local
- Flights, hotels, meals for multiple trips
- Some people travel internationally for specific artists
Touch-ups: Budget 10–20% of original cost over the life of the tattoo
- Some artists include free touch-ups within a year
- Others charge their normal rate
- Color tattoos often need more maintenance
Time Off Work: Depending on placement and your job
- Hand/neck/face tattoos may require recovery time before returning to certain workplaces
- Physical jobs may require time off during healing
Payment Strategies
Save First (Recommended)
- Set a sleeve savings goal
- Wait until you have 125% of estimated cost (buffer for overages)
- No financial stress during the process
- You can take breaks between sessions if needed
Payment Plans
- Some shops offer in-house payment plans for large pieces
- Typically require 50% down, remainder over 3–6 months
- Sessions happen after each payment
- Ask about this during consultation
Session-by-Session
- Pay as you go
- Requires consistent cash flow
- Risk of longer gaps if finances get tight
- May cost more overall due to more setup time
Use our Tattoo Price Calculator to get a personalized estimate based on your specific sleeve parameters.
Step 3: Find the Right Artist
A sleeve is too big, expensive, and permanent to trust to just any artist with an open appointment. This decision deserves serious research.
What to Look For
Style Specialization Don't go to a realism artist for a Japanese sleeve. Don't go to a traditional artist for photorealistic portraits. Look for artists who:
- Have extensive portfolio work in your desired style
- Clearly specialize (not "I do everything")
- Show healed photos (not just fresh work)
Sleeve Experience Ask specifically:
- How many sleeves have they completed?
- Can you see photos of completed sleeves (not just in-progress)?
- Do they have experience with your skin tone (important for color work)?
Technical Skill Indicators
- Clean, consistent linework
- Smooth shading gradients (no blotchy areas)
- Proper saturation (color should look solid, not patchy)
- Knowledge of how tattoos age (designing for the long term)
Professionalism
- Clean, licensed shop
- Willingness to answer questions
- Clear communication about process and pricing
- No pressure tactics
Where to Find Artists
Instagram: Primary portfolio platform for most artists
- Search #[style]tattoo + your city
- Look for consistent quality across multiple posts
- Check Stories for "healed and settled" photos
Shop Websites: Often have artist portfolios and booking info
Tattoo Conventions: See artists from outside your area
- You can book with traveling artists
- Watch them work in person
- Often have flash available
Referrals: Ask people with sleeves you admire
- Most tattoo enthusiasts love talking about their artists
- Personal experiences reveal things portfolios can't
Red Flags to Avoid
- Portfolio only shows small tattoos or fresh work (no healed sleeve examples)
- Prices significantly below market rate (corners being cut somewhere)
- Willing to copy another artist's custom design
- Pushes you toward their style instead of listening to your vision
- Shop seems unclean or unprofessional
- No license displayed
- Poor reviews mentioning hygiene or communication issues
The Consultation Process
Most reputable artists offer free consultations. This is your interview process. Come prepared with:
Reference Images: 5–10 images showing:
- Your desired style
- Specific elements you want
- Composition ideas
- What you don't want (equally important)
Questions to Ask:
- "What's your experience with [specific style] sleeves?"
- "How long do you estimate this will take?"
- "What's your hourly rate, and do you offer any package pricing for full sleeves?"
- "How do you handle design approval? Will I see sketches before the first session?"
- "What happens if I need to reschedule?"
- "Do you include touch-ups, and for how long?"
- "What's your approach to composition and flow?"
Listen For:
- Enthusiasm about your project
- Questions about your lifestyle (sun exposure, job restrictions)
- Honest assessment of what's possible
- Willingness to collaborate, not just dictate
Step 4: Design Your Sleeve
This is where your vision becomes a concrete plan. You have three main approaches:
Option 1: Artist-Led Design
How it works: You describe your vision, the artist designs everything
Pros:
- Artist's expertise guides the composition
- Cohesive vision from a professional
- Often faster than collaborative approaches
Cons:
- Less control over specific elements
- Requires trust in the artist's vision
- May need multiple revision rounds
Best for: People who have a general concept but want professional guidance on execution
Option 2: Collaborative Design
How it works: You bring ideas, references, and concepts; artist refines and composes
Pros:
- Your input shapes the final design
- Artist's technical knowledge improves your ideas
- Good balance of personal meaning and professional quality
Cons:
- Takes more time and communication
- Requires flexibility (your exact vision may not work technically)
Best for: Most people—this is the standard approach for good reason
Option 3: AI-Assisted Planning
How it works: Use AI tattoo generators to explore concepts, then take refined ideas to a human artist
Pros:
- Explore many variations quickly
- Visualize ideas before committing
- Generate concepts for elements you can't describe well
- Free or low-cost experimentation
Cons:
- AI doesn't understand technical tattoo constraints
- Designs may need significant modification for actual tattooing
- Still requires a skilled artist to execute
How to use AI effectively for sleeve planning:
- Explore Styles: Generate examples in different styles to confirm your preference
- Test Compositions: See how different elements might flow together
- Generate Elements: Create specific pieces (a particular flower, animal, symbol) to show your artist
- Refine Ideas: Start vague, get more specific based on results
For best results, use our AI tattoo generator to create reference concepts, then work with your artist to adapt them into a tattooable design. Check out our guide on how AI tattoo generators work to understand their capabilities and limitations.
Important: AI is a planning tool, not a replacement for a tattoo artist. The designs need professional adaptation for actual skin.
Design Elements to Consider
The "Canvas" Approach Think of your arm as having distinct zones:
- Shoulder cap: Often the focal point or "anchor" of the sleeve
- Upper arm: Largest canvas area
- Elbow: Challenging area, often used for mandalas, flowers, or background elements
- Forearm: Highly visible, good for detail work
- Wrist: Natural stopping/starting point
Background Elements Sleeves need "fill" to create cohesion:
- Smoke, fog, or clouds
- Waves or water
- Mandala patterns
- Geometric shapes
- Abstract textures
These elements connect the main subjects and prevent a "sticker collection" look.
Flow and Movement Good sleeves guide the eye:
- Curved lines that follow arm anatomy
- Subjects oriented in the same general direction
- Background elements that create pathways between focal points
- Consider how the design looks when your arm is at your side vs. raised
Negative Space Not everything needs to be filled:
- Strategic skin breaks give the eye rest
- Some styles (Japanese, traditional) use more negative space
- Others (blackwork, geometric) aim for full coverage
- Discuss this preference with your artist
Step 5: Schedule and Execute
You've found your artist, approved the design, and saved your money. Now comes the actual execution.
Session Planning
Session Length
- Most artists work in 4–6 hour blocks
- Longer isn't always better—artist fatigue affects quality
- Your pain tolerance limits session length
- Discuss with your artist what schedule works best for your project
Healing Between Sessions
- Minimum 2–3 weeks between sessions
- Some artists prefer 4–6 weeks for heavy saturation work
- Rushing leads to poor healing and compromised results
- Plan your calendar accordingly
Typical Full Sleeve Timeline
- Session 1: Outline and some shading (outer upper arm)
- Session 2: Continue upper arm
- Session 3: Shoulder cap
- Session 4: Inner upper arm
- Session 5: Elbow area
- Session 6: Outer forearm
- Session 7: Inner forearm
- Session 8: Wrist and final details/touch-ups
Note: This varies dramatically by style, complexity, and individual artist approach.
Pain Management Strategy
Sleeves hurt. There's no avoiding it. But you can be strategic:
Most Painful Areas (plan shorter sessions):
- Inner bicep
- Elbow ditch and bone
- Inner forearm near wrist
- Armpit area (if extending toward chest)
Least Painful Areas (can handle longer sessions):
- Outer upper arm
- Outer forearm
- Shoulder cap
Pain Management Tips:
- Get good sleep before sessions
- Eat a solid meal 1–2 hours prior
- Stay hydrated
- Avoid alcohol for 24 hours before (thins blood)
- Bring distractions (headphones, book, phone)
- Consider numbing creams (discuss with artist first—some don't like them)
- Breaks are okay—ask when you need one
Aftercare Between Sessions
Proper healing is essential for a quality sleeve:
Immediate Aftercare (First 24–48 hours):
- Keep bandage on per artist instructions
- Wash gently with unscented soap
- Apply thin layer of recommended ointment
- Avoid soaking (showers okay, baths/showers not)
Healing Phase (2–4 weeks):
- Moisturize regularly with fragrance-free lotion
- No swimming or hot tubs
- No direct sun exposure
- Don't pick at scabs
- Wear loose clothing over the area
Long-term Care:
- Sunscreen is non-negotiable (SPF 30+ on tattoo)
- Moisturize regularly
- Healthy skin = better looking tattoo
Step 6: Plan for the Long Term
A sleeve isn't done when the last session ends. It's a lifetime commitment.
Touch-Up Strategy
All tattoos fade and blur over time. Sleeves need periodic maintenance:
First Touch-Up: 6–12 months after completion
- Addresses any spots that didn't heal perfectly
- Often included free by the original artist
Ongoing Maintenance: Every 5–10 years
- Brightens faded colors
- Sharpens blurred lines
- Budget $200–$500 per refresh
When to Touch Up:
- Noticeable fading or color loss
- Lines losing crispness
- Patchy areas becoming visible
Lifestyle Considerations
Sun Exposure
- UV radiation is the #1 enemy of tattoo longevity
- Sunscreen on your sleeve every day it's exposed
- Long-term sun damage is expensive to fix (if fixable at all)
Weight Changes
- Significant muscle gain/loss or weight fluctuation affects how the tattoo sits
- Sleeve designs accommodate some change, but extreme changes distort artwork
Aging
- Skin loses elasticity over time
- Designs with heavy detail in high-movement areas may blur faster
- This is normal—embrace the lived-in look or budget for refreshes
Career Implications
- Sleeve coverage is increasingly accepted, but not universally
- Some industries still have visible tattoo restrictions
- Consider your career trajectory before committing
Common Sleeve Planning Mistakes to Avoid
After years of observation, here are the most frequent pitfalls:
1. Rushing the Process
The mistake: Wanting it done as fast as possible, booking whoever is available soonest
Why it fails: Sleeves take time—both in execution and planning. Rushing leads to poor artist selection, compromised designs, and regret.
Do this instead: Start planning 6–12 months before you want to begin. Wait for the right artist.
2. Ignoring the Background
The mistake: Focusing only on the "cool subjects" and leaving background as an afterthought
Why it fails: Background elements make a sleeve cohesive. Without them, you have a collection, not a sleeve.
Do this instead: Plan background/filler from the beginning as part of the overall composition.
3. Price Shopping
The mistake: Choosing the cheapest option instead of the best artist for the style
Why it fails: A bad sleeve is expensive to fix (laser, cover-up, or removal). Quality work from a skilled artist is actually the most economical choice.
Do this instead: Budget appropriately and save longer if needed. This is permanent art on your body.
4. Copying Someone Else's Sleeve
The mistake: Bringing photos of someone else's custom sleeve and asking for "the same thing"
Why it fails: It's unethical (copying custom work), won't fit your arm the same way, and you'll always be comparing yourself to the original.
Do this instead: Use reference photos to communicate style preferences, but work with your artist on a unique design.
5. Forgetting About the Inner Arm
The mistake: Planning only for the visible outer arm, neglecting the inner bicep and forearm
Why it fails: The inner arm is highly visible when your arm is relaxed. Ignoring it creates an unbalanced look.
Do this instead: Consider the full 360° of your arm in the design plan.
6. Inadequate Budgeting
The mistake: Budgeting only for the tattoo cost, forgetting tips, aftercare, touch-ups, and potential overruns
Why it fails: Financial stress ruins the experience. Running out of money mid-sleeve leaves you with unfinished work.
Do this instead: Budget 125–150% of quoted price to cover all associated costs.
Frequently Asked Questions About Sleeve Planning
How long does it take to complete a full sleeve?
Most full sleeves take 6 months to 2 years to complete. This accounts for:
- 6–15 tattoo sessions (depending on complexity)
- 2–6 weeks healing between sessions
- Artist availability and scheduling
- Your budget and ability to maintain session frequency
Rushing the process compromises quality and healing.
Can I add to an existing tattoo to create a sleeve?
Yes, but it requires careful planning. An existing tattoo can serve as the anchor point, with new work designed to flow around and complement it. Challenges include:
- Matching style of existing work (or creatively transitioning)
- Working with existing composition constraints
- Potentially fading/covering elements that don't fit the new vision
Consult with artists who specialize in "working around" existing tattoos.
What if I can't afford to finish my sleeve?
This is why budgeting is crucial. If you're mid-sleeve and run into financial difficulty:
- Most artists are understanding about pausing work
- It's better to wait than to switch to a cheaper artist
- Some shops offer payment plans for active projects
- Communicate with your artist—they want you to finish too
Prevention: Only start a sleeve when you have the full budget saved, plus a buffer.
How do I know if an artist is right for my sleeve?
Beyond portfolio quality, ask yourself:
- Do they listen to my ideas and ask good questions?
- Do they explain their process clearly?
- Do I feel comfortable spending 20+ hours with this person?
- Are they honest about what's possible and what isn't?
- Do their healed sleeve photos hold up over time?
Trust your gut. If something feels off during consultation, keep looking.
Can I use AI to design my entire sleeve?
AI can help you visualize and explore concepts, but you shouldn't use AI output directly as a tattoo design. AI doesn't understand:
- How tattoo ink behaves in skin
- Technical limitations of tattooing
- How designs need to flow with body movement
- Healing and aging considerations
Use AI as a reference tool, then work with a professional artist to create a design that actually works as a tattoo.
Should I get a half sleeve first?
Half sleeves are a good entry point if you're unsure about committing to a full sleeve. Benefits:
- Lower cost and time commitment
- Can always extend to full later
- Good "test run" for your pain tolerance and lifestyle adjustment
Considerations:
- The transition from half to full requires careful planning
- Artist availability months/years later isn't guaranteed
- Your tastes may change
What's the most painful part of a sleeve?
Generally, from most to least painful:
- Inner bicep (near armpit)
- Elbow ditch and bone
- Inner forearm/wrist
- Back of arm (tricep area)
- Outer forearm
- Outer upper arm
- Shoulder cap
Pain is subjective, but these rankings hold true for most people.
How do I prepare for my first sleeve session?
The night before:
- Get good sleep
- Eat a substantial dinner
- Hydrate well
- Avoid alcohol
Day of:
- Eat a solid meal 1–2 hours before
- Wear comfortable clothing that allows arm access
- Bring entertainment (headphones, etc.)
- Bring water and snacks
- Arrange transportation (you may not want to drive after)
Mentally:
- Accept that it will hurt, but it's manageable
- Trust your artist
- Remember why you're doing this
Final Thoughts: Is a Sleeve Right for You?
A sleeve is a significant commitment. Before you start, honestly consider:
Can you afford it properly? Including the buffer for overruns and tips?
Is your career/lifestyle compatible? Will visible tattoos cause problems?
Have you thought about it long enough? If this is a sudden impulse, wait a year. The idea should mature with you.
Are you prepared for the discomfort? Both during sessions and the healing periods?
Do you trust your artist completely? You'll be working together for months.
If you answered yes to all of these, you're ready to plan a sleeve that will look incredible and meaningful for decades to come.
The process—research, saving, consultations, design sessions, the tattooing itself—is part of the experience. Embrace it. The anticipation and care you put into planning will show in the final result.
Ready to start designing? Use our AI tattoo generator to explore concepts, or jump straight to our Tattoo Price Calculator to start budgeting your sleeve project.
Quick Reference: Sleeve Planning Checklist
3+ Months Before:
- Define your style preference
- Set savings goal (125% of estimate)
- Research artists in your target style
- Create reference folder of inspiration images
2 Months Before:
- Book consultations with 2–3 artists
- Discuss vision, timeline, and pricing
- Review artist portfolios for healed sleeve work
- Select your artist and book first session
1 Month Before:
- Finalize design with artist
- Pay deposit
- Clear schedule for healing periods
- Purchase aftercare supplies
Week Before:
- Confirm appointment
- Arrange time off if needed
- Prepare entertainment for session
- Get good sleep leading up to appointment
During Process:
- Follow aftercare instructions exactly
- Attend all scheduled sessions
- Communicate with artist about any concerns
- Stay patient—quality takes time
After Completion:
- Schedule touch-up if needed
- Establish sun protection routine
- Enjoy your art for decades to come