 Francesco Chiaramonte
To make a tattoo design with AI, describe your idea in a text prompt, choose a style, generate several versions, change one detail at a time until the design reads clearly, then preview it on your body and show it to a tattoo artist. The whole process takes a few minutes of generating and a few days of looking at the result before you commit. AI gives you a concept to talk about. Your artist turns it into something that works on skin.
This guide walks through the six steps, then shows how I use each tool in Ink Studio AI, with prompt templates, fixes for common bad results, and a checklist for getting from concept to appointment.
The 6-Step Process at a Glance
- Define the idea. Write one sentence: subject, meaning, and where it will go on your body.
- Pick one style. Choose a single tattoo style (fine line, traditional, Japanese, blackwork) instead of mixing several.
- Write a specific prompt. Name the subject, style, color, and what to leave out.
- Generate and iterate. Make 3 to 5 versions and change one thing per round.
- Refine and test placement. Convert a sketch, clean up the look, and preview the design on a photo of your body at real size.
- Take it to an artist. Bring the concept as a reference and let the artist redraw it for your skin.
Step 1: Define the Idea Before You Open a Generator
Most weak results come from a vague starting point. "A cool animal" gives the model nothing to decide with, so it decides for you.
Before you prompt, write down three things: the subject (a wolf, a peony, a compass), the feeling (calm, aggressive, nostalgic), and the placement (forearm, ribs, shoulder blade). Placement matters early because a tall, narrow design for a forearm is a different composition from a wide design for a chest. If you have no idea yet, the tattoo idea generator and the tattoos gallery are good places to collect options.
Step 2: Pick One Style First
Style controls line weight, shading, and color more than any other word in your prompt. Pick one and stay with it for the first rounds.
If you are unsure, start with the style that matches how you want the tattoo to age. Bold lines and limited color (Traditional, Neo-Traditional) hold up well. Very fine lines and tiny detail look sharp on screen but are harder to keep readable on skin over the years, so check with an artist before you commit to them. The tattoo styles guide explains how each style behaves in AI generation.
Step 3: Write a Prompt the Model Can Use
A good tattoo prompt has four parts: subject, style, color, and exclusions. Other guides add placement and contrast, for example CapCut's 2026 walkthrough suggests describing the subject, style, placement, and constraints, and pairs a main prompt with an anti-prompt such as "no extra fingers, correct anatomy" (CapCut, April 2026).
Use these templates and swap in your own subject:
| Goal | Prompt template |
|---|---|
| Simple single image | [subject], [style] tattoo, black ink, white background |
| Fine line | Fine line [subject], thin consistent lines, no shading, lots of negative space |
| Traditional | Traditional tattoo of [subject], bold black outlines, limited palette of red, yellow, green, flat shading |
| Japanese | Japanese irezumi [subject] with wind bars and waves, bold outlines, black and gray with red accents |
| Blackwork | Blackwork [subject], solid black fills, high contrast, no gradients |
| Realism | Realistic black and gray [subject], soft smooth shading, detailed texture |
| Botanical | [flower] with stem and leaves, delicate linework, vertical composition for a forearm |
| Symbolic | [subject] combined with [second element], centered composition, symmetrical, [style] |
Ask for a flat design on a plain background. If you ask for "a tattoo", some models return a photo of an arm with ink on it, which is useless as a reference. For more templates and wording tips, see the AI tattoo prompts guide.
Step 4: Generate, Then Iterate One Change at a Time
Treat the first result as a draft. Generate three to five versions, pick the closest, and change one variable per round. If you change the subject, the style, and the color together, you can't tell which edit helped.
Use this table to decide what to change:
| What looks wrong | What to change |
|---|---|
| Too busy, hard to read at small size | Remove elements, add "simple", "minimal detail", "negative space" |
| Lines too thin or fuzzy | Switch to a bolder style or add "bold outlines" |
| Wrong mood | Change the adjective ("serene" instead of "fierce") and the style together |
| Hands, faces, or animals look deformed | Add the problem to the negative prompt (for example "extra fingers") and simplify the pose |
| Garbled text or lettering | Remove the words from the image and set them separately with the font generator |
| Background clutter | Add "plain white background, isolated design" |
| Looks like a photo, not a tattoo | Name a tattoo style and ask for "flat design, tattoo flash" |
Stop when you have two or three versions you would be happy to show someone. More than that and you are just comparing noise.
Step 5: Refine With Image Tools and Test Placement
A text prompt is only one way in. If you already have a sketch, a photo, or an old tattoo you want to rework, start from that image instead. This is where most people get a better result than from text alone.
Once you have a design, check it on the body. A flat design that looks great on a white page can look too big, too small, or oddly shaped on a forearm. Preview it, measure it, and then decide.
Ink Studio AI Walkthrough: What Each Tool Does
Here is how the pieces fit together in Ink Studio AI. Each tool covers one step of the process above.
| Tool | What it does | Use it for |
|---|---|---|
| Text-to-tattoo generator | Turns a written idea into a tattoo concept. You pick a style, color option, and can add a negative prompt. | Step 3 and 4: first drafts and variations |
| Image-to-tattoo | Converts a photo or sketch into a tattoo-style concept | Pet portraits, memorial pieces, your own drawings |
| Style transfer | Applies the look of a reference tattoo to your subject | Matching an artist's style or a tattoo you like |
| Try-on | Places a flat design on your body photo | Step 5: checking size, position, and proportion |
| Tattoo to stencil | Turns a design into a cleaner line reference | Giving the artist a clear outline to work from |
| Size calculator | Suggests size ranges by body area | Choosing how big the design should be |
| Font generator and name generator | Previews lettering and names in tattoo fonts | Text, dates, and names that AI images spell badly |
The Text-to-Tattoo Generator
On the home page, type your idea into the prompt box. You can use the Optimize option to let the tool add detail to your wording, and a negative prompt field for things you want to leave out. Then choose a style and a color option (black and white or colored), and generate.
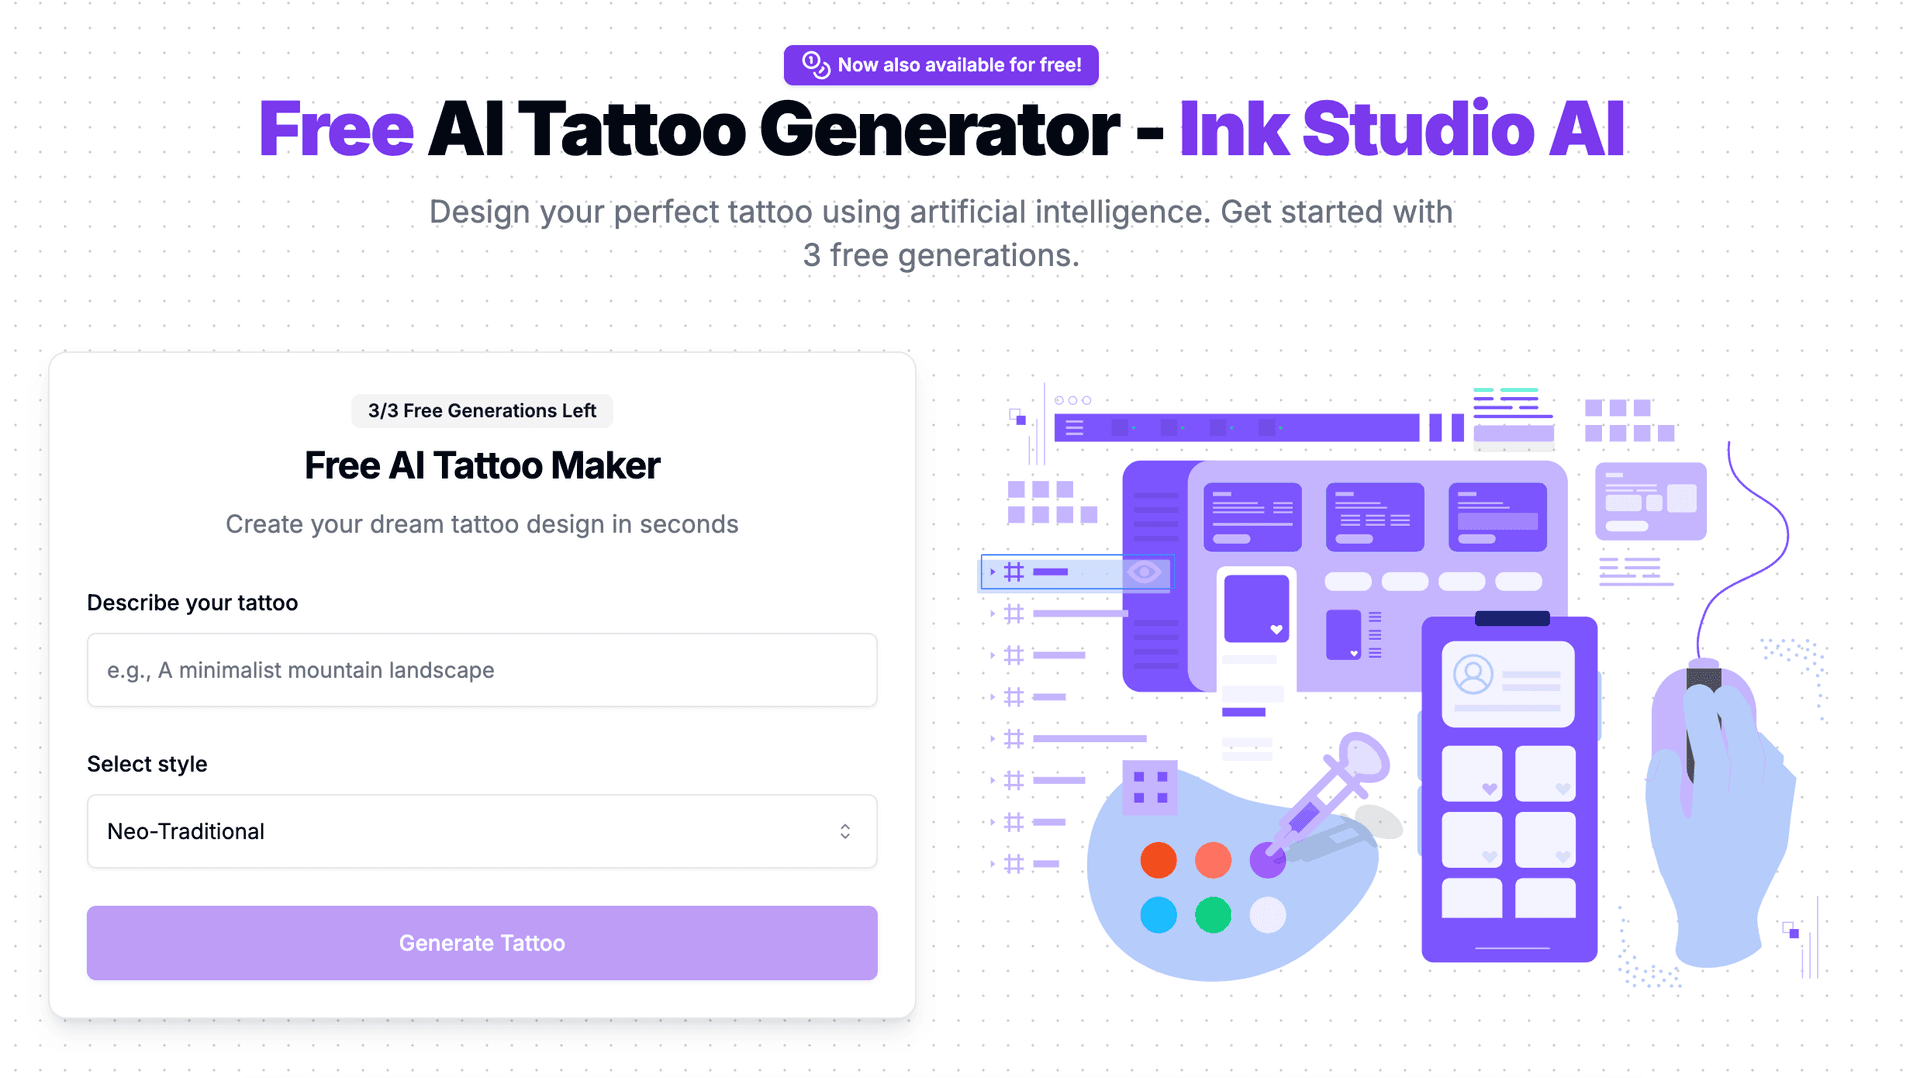 Ink Studio AI's landing page
A few styles, including Neo-Traditional, Japanese, and Black and Gray, are available on the free path. Others, such as Minimal, Watercolor, Traditional, Realism, Geometric, Tribal, 3D, Surreal, and Text, are marked as Pro styles.
 Ink Studio AI's available styles
When a design is ready, use the download button to save it to your device.
 Ink Studio AI Premium Tattoo Generation / Japanese Style
Starting From a Photo or a Sketch
If you want a tattoo of a pet, a person, or a drawing you made, use the image tool rather than describing it in words. Clear, well-lit photos convert better than dark or cropped ones. Our photo conversion guide covers how to prepare the image.
Testing Placement Before You Book
The try-on tool places your design on a photo of your body. It is a flat 2D composite, not augmented reality or a 3D model, so it shows rough size and position but not how the design wraps around a curved limb. Use it to decide between two placements, then ask the artist to confirm.
Free vs. Paid: What to Expect
New accounts can create a first design without a credit card. After that, continued use needs an access plan or credits. The plans are one-time payments, not auto-renewing subscriptions, and they include unlimited text-to-tattoo generations during the access window plus Premium credits for the heavier tools. Check the pricing page for current plans, because they change.
The free path is enough to test whether AI design suits you. If you want to compare many versions, use the photo and try-on tools, or use the Pro styles, expect to use an access plan or credits.
From Concept to Appointment: A Checklist
Before you book, go through this list:
- I chose one style and know why.
- I generated at least three versions and picked one or two favorites.
- I checked the design at the size I plan to get it, using the size calculator.
- I previewed it on my body photo in two possible placements.
- I looked at it again after a few days.
- I saved the original image, a stencil-style line version, and the prompt.
- I picked an artist whose portfolio matches the style.
- I am ready to let the artist change the design.
What AI Output Is, and What It Is Not
An AI image is a concept. It is not a stencil, and it is not a finished design for skin. Ink Studio AI's own limits are clear on this: generated images can contain anatomy, lettering, line-weight, and composition errors, and an artist should redraw and adapt any concept for skin, placement, ageing, and safe application.
A good artist will usually keep your idea, subject, and mood, and change the details that will not work: lines that are too close together, fine detail that will blur, or shapes that do not fit the body part. That is normal, not a rejection of your design. For a longer take on how the two compare, read AI vs. human tattoo artists.
Common Mistakes
- Mixing too many styles. "Japanese watercolor geometric realism" gives you none of them.
- Prompting for the photo, not the design. Ask for a flat design on a plain background.
- Skipping size. A design that works at A4 may be unreadable at 5 cm.
- Trusting AI lettering. Add words with a font tool, or let the artist hand-letter them.
- Copying a living artist's work or protected characters. Use references for style and mood, not for copying.
- Treating the first result as final. Iterate, then wait a few days.
- Walking in with a demand. Bring the concept as a starting point and ask what the artist would change.
Frequently Asked Questions
Can I design my own tattoo with AI for free?
Yes, to a point. Ink Studio AI lets new accounts create a first design without a credit card, and some styles are on the free path. Continued use, Pro styles, and the heavier tools need an access plan or credits.
Is it okay to bring an AI design to a tattoo artist?
Many artists welcome a reference, as long as you present it as an idea and not a finished stencil. Some artists decline AI-based work, so ask before you book. Expect them to redraw it.
How do I make an AI tattoo design from a photo?
Use an image-to-tattoo tool with a clear, well-lit photo and one main subject. Pick a style, convert, and compare two or three versions. See the image-to-tattoo tool and the photo preparation guide linked above.
Which style should I pick first?
Pick the one closest to tattoos you already like. If you have no preference, start with a bold style such as Neo-Traditional or Black and Gray, because the lines are easier to judge and tend to stay readable over time.
How many variations should I generate?
Three to five per round is enough. Change one thing between rounds, and stop once you have two or three versions you like. After that, more variations make it harder to choose.
Can I use an AI tattoo design as a stencil?
No. Treat it as a concept. A tattoo artist redraws the design as a stencil that fits your body part and skin. The tattoo-to-stencil tool can give the artist a cleaner line reference, but it does not replace their work.
Who owns an AI-generated tattoo design?
It depends on the tool's terms and your country's law. Results are not guaranteed to be unique. Read the AI tattoo copyright guide before you commit to a design you want to protect.